Showing posts with label off grid. Show all posts

Friday, May 2, 2014

GadgetMe....small magnetic leds

I have made a few led lights that run on 12 volt AGM batteries for aux. lighting for small areas

The LEDs will last at least 2 weeks running all night long (tested it on the cat room)


Here is one wired directly showing the battery and light

The light housing is machined out of round aluminum stock,
The LED mounted inside of the unit and a magnet epoxied to the back to enable the light to attached to metal surfaces.

The battery is a AGM 7.5 amp hr..
Used in many cases as back up batteries for alarms.


   These would be great little lights for vans, reading lights, they can be used almost anywhere

What do ya think?

Monday, April 21, 2014

Off-Grid Reverse Osmosis .. water purification

 I have had some discussions with folks who travel about water quality for drinking water, so do ever know what is in the water you are paying for?

About a year ago I had an extra Reverse Osmosis water purification system laying around.

Since, I have used one for purifying nasty well water for the last 10 years. It has been filtering out carbon, salt, and slime, and who knows what else, since there are major fracking operations all around this part of the country.

The reverse Osmosis makes the water drinkable for me ..

When traveling to "other " parts of the country I am very weary of "what they" put in the drinking water.
We know that "they" add chlorine gas, chlorimine chemical, fluoride, arsenic levels have been relaxed, plus other stuff they keep secret .. (not much trust here from where I stand)

Here is the latest design so far, the filter system is a standard RO filter system you can purchase at the big box stores, they are pricey.
 But, worth every penny.
  Last year, I  filtered thousands of gallons per year with the unit, it takes about 4 years of continuous use to plug up the original filter canisters, from a well using a whole house course filter as a primary filter.

I have added a 12 volt RV water pump to supply enough pressure to be able to push the purified water through the RO membrane.

Also installed is a switch to be able to turn off the pump as needed, I use Anderson connectors for the 12 volt electrical connections that come from a 12 volt deep cycle battery.


 The RV water pump is not self priming, So I found a cool little 12 volt marine pump used in boats for their sinks and showers, it is 12 volt power, and submersible, makes for a super priming pump.

Above is the RO purified is shown being collected in a 5 gallon water cooler.
 In a RO system there is water not filtered through the RO membrane, which is up to 95%, this is still highly filtered water, in the RV I use this water for general purposes, such as for washing dishes, toilet water, shower water, water that is not consumed internally.

During this run of purifying drinking water I am taking water from a holding tank through a garden hose, to the RO system, from the RO system the purified water is collected in the blue tank, the by pass water is filling the fresh water tank of the RV.

I have also used this system to purify water in the southwest using a plastic badder filled with water and carried to the  RV, with the suburban and using the Solar System in the Suburban to supply the necessary electrical power to run the filter system.
So, if you would like to purify water off- grid this is an alternative way to do so, I also have the Berkey System gravity filter that will work to take out most of the nasty stuff, but, I really do not trust a gravity system to remove some viruses, chemicals, and radiation.


Sunday, February 24, 2013

L.E.D Lighting with 12 volts ..

 When using off grid power, many conservations center around how much solar power and batteries do I need to have.

In my experience:
 The first thing to consider is how much electrical power do you use on an average day.

You use many electrical consuming devices,  inverter to run 110 volt appliances, furnace motor when in cold weather, tv's, satellite receivers, computers, signal boosters for internet and phones, warning devices, some have even more demands. A rough energy audit really helps as a starting point.

It has always been a goal to lower the power consumption. It is easy to keep the batteries full during perfectly sunny days, But weather does not always cooperate, so it is a good idea to have some overcapacity when it comes to charging batteries, and under consumption when it comes to usage.

One of the ways to sustain the battery power available especially during the cloudy calm days is to use a little of amp hours as possible during those days.

I have been playing with LED lights for a few years and there have been great advances in the quality and cost of the led lights.

Here is a little information I can relay to those thinking about it:

When starting these were the only leds that were available, seperate (I call) bulb type of leds attached to a board.


They worked ok, were not very bright, also some of the "bulbs" would burn out

 I used these bulbs in the light fixtures that I used the most of the time to keep the electrical usage as low as possible for lighting.


 Later on the SMD LED  came out.
What an improvement, they are much brighter.
Here is more information on them.
 They use 2.4 watts
The old incandescent bulb uses 23 WATTS.

Consider each light fixture in a camper has two of these lights. The power saving is incredible.
46 watts compared to 4.8 watts for each light fixture.


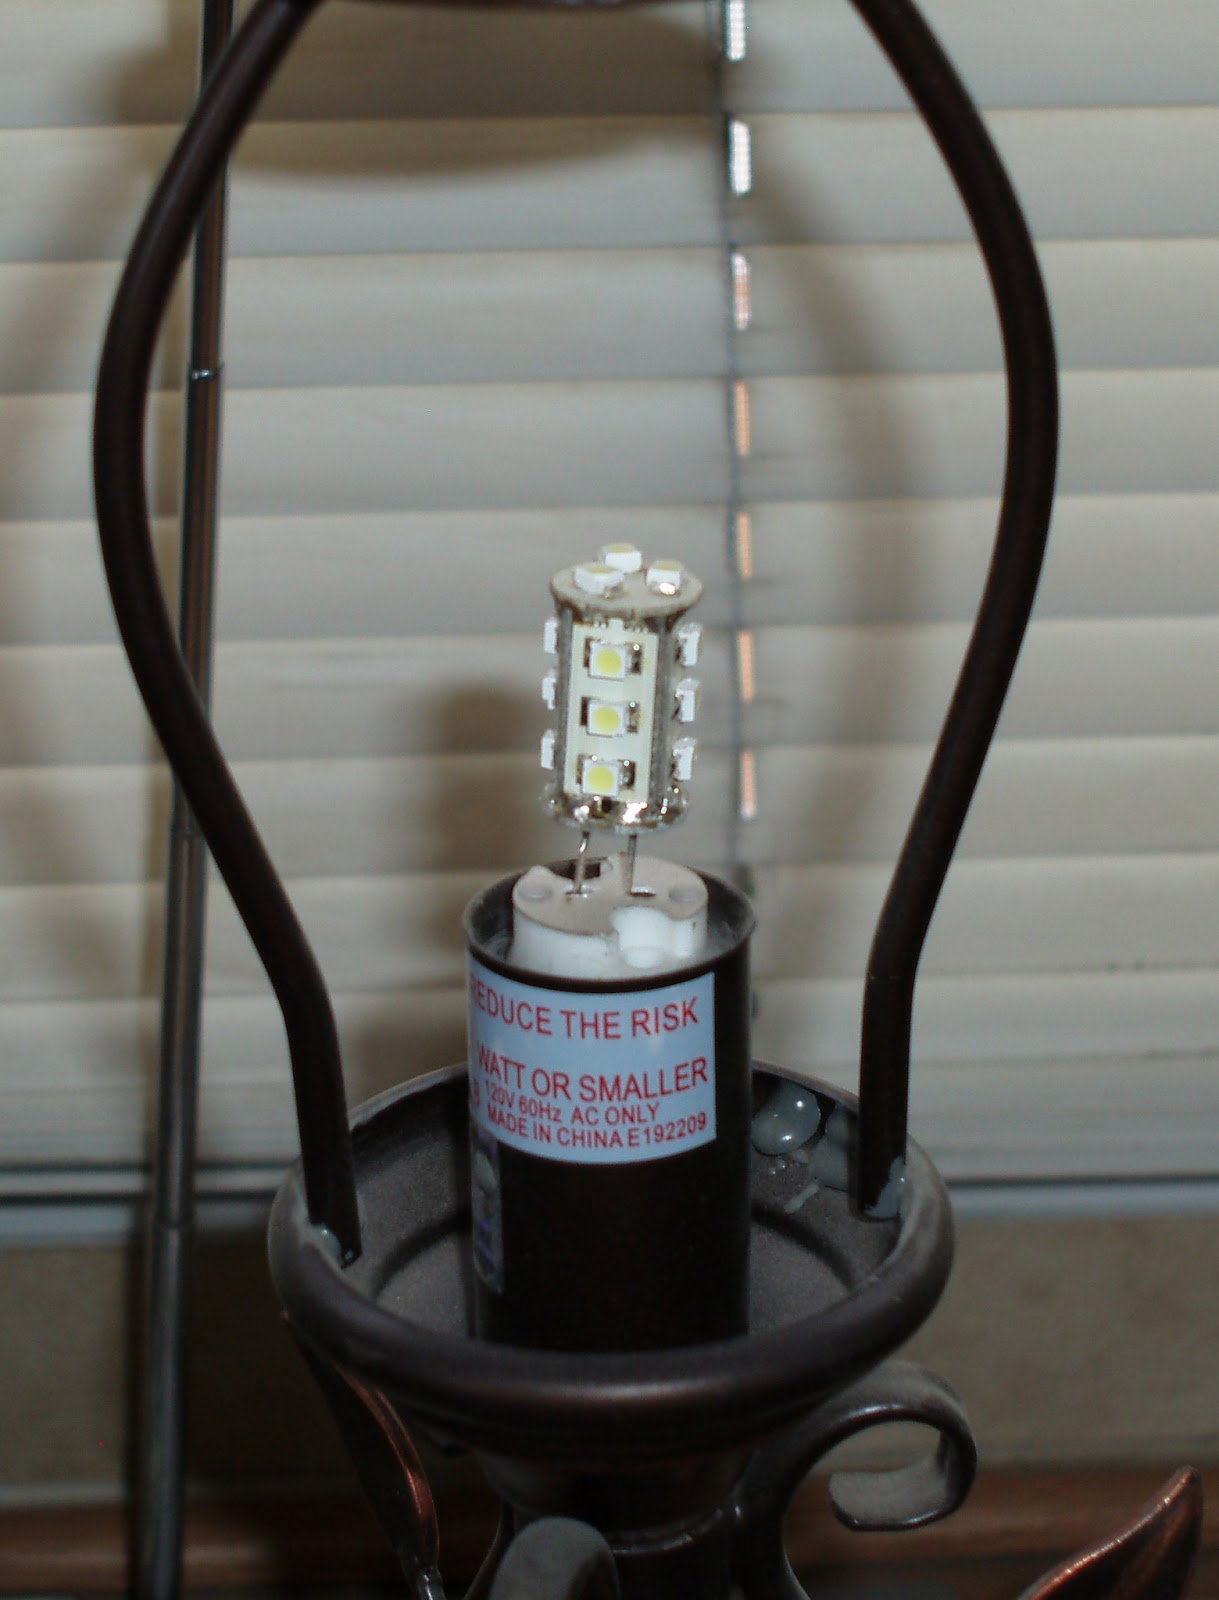
 A couple of years back I decided it would be nice to have a lamp between the recliners, since there is a cabinet that houses the the converter and electrical boxes.

I shopped around for awhile and found a small lamp ... found this one at Lowe's

Since I did not want to use 110 volt light bulbs that uses way too much power.

I disassembled the electrical components to adapt it to LED power.


 This shows the led light fitted to the lamp.

The bulb only  uses 1.5 watts !
Although it is equivalent to a 25 watt bulb light output wise.

 Here is where I got the LED

 I am a big fan of Superbrightleds.com. I know there are cheaper places to get leds, I like the super customer service, and products that work.


 This shows the  MR16 receptacle for the led in the 110 volt housing, I used common silicone to full the void in sizes of the hardware of the 110 volt housing.

 Worked out really well and easy to do.

Here is where you can get the MR16 Socket


I have also played with some outdoor leds this year:

These are sealed for outdoor use. The ones I purchased have 4 leds, they also have units with 6 leds.
The four led units are pretty bight, not disappointed
 Here is the link for these guys
They use .3 watts per unit


I installed 3 of the led units on the side of the camper to use for outdoor activities,
 I like them . very pleased..

Activities like this one
This photo show the lighting using power provided completely off-grid in the Arizona Desert

The palm tree is powered by solar rope led lights that have their own small solar panels
Although it hard to see the neon lights are run by an inverter
The  pink flamingo's are powered by small led I put inside of them
The light at the right is a solar powered yard light that is on top of a re bar pole.
The open door on the left, you can see the interior led lights lighting up the inside of the trailer.

This shows the neon and flamango's lighted 

CHEERS !


Saturday, December 15, 2012

Solar & Battery Bank Combiner Boxes

Since the middle of the week I have been slowed down by this year's flu virus.

Before pretty much shutting down (staying inside ugh)
I took some photos of the new combiner boxes I need for the new battery box on the camper.

Simple DIY combiner boxes made from common parts found at the big box building stores.

This is a common electrical box that is the narrow variety, that you would use in a home outlet.


The two lugs will stack on each other, the holes will line up, making it so they are connected togather, giving 4 clamping spots for the wires to be combined.

This shows a lug positioned in the center of the box, then drilling a hole to enable bolting togather both lugs.


After drilling the hole flip over the box, use a countersink cutter to countersink the hole so the tapered bolt will be flush with the back of the box.
This will prevent possible shorting, you could also cover with electrical tape or silicone to prevent metal touching..

The bolt is 1/4" x 20, 1 inch long


After counter sinking, install the bolt, add the lugs, tighten them down with a ny-lock nut you are ready to punch out the access holes of the box, add wires.


Pretty simple and cheap
For outdoor use  purchase blank plastic covers.
To weatherproof the areas where the wires come through, use silicone to seal the ports.

I have used these since 2006, they are still going strong

I should mention that you need 2 of these boxes for a 12 volt or direct current system ..One Positive ..One Negative 


View of a combiner box installed in the new battery box

The black piece at the top is a shunt that is added for monitoring the output of the wind charger (more on that later)
This is one of the old combiner boxes being replaced it too large for the new box.


A preview of the new box, setting on the frame, mocking up for mounts.