Before pretty much shutting down (staying inside ugh)
I took some photos of the new combiner boxes I need for the new battery box on the camper.
Simple DIY combiner boxes made from common parts found at the big box building stores.
| This is a common electrical box that is the narrow variety, that you would use in a home outlet. | |
 | |
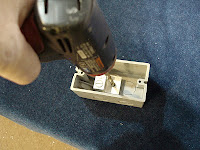
This shows a lug positioned in the center of the box, then drilling a hole to enable bolting togather both lugs.
After drilling the hole flip over the box, use a countersink cutter to countersink the hole so the tapered bolt will be flush with the back of the box.
This will prevent possible shorting, you could also cover with electrical tape or silicone to prevent metal touching..
The bolt is 1/4" x 20, 1 inch long
After counter sinking, install the bolt, add the lugs, tighten them down with a ny-lock nut you are ready to punch out the access holes of the box, add wires.
Pretty simple and cheap
For outdoor use purchase blank plastic covers.
To weatherproof the areas where the wires come through, use silicone to seal the ports.
I have used these since 2006, they are still going strong
I should mention that you need 2 of these boxes for a 12 volt or direct current system ..One Positive ..One Negative
View of a combiner box installed in the new battery box
The black piece at the top is a shunt that is added for monitoring the output of the wind charger (more on that later)
A preview of the new box, setting on the frame, mocking up for mounts.


No comments:
Post a Comment